CJackson97
New member
Hey Peeps!
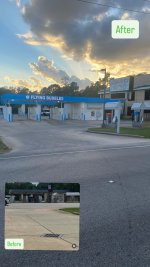
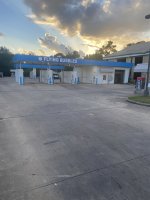
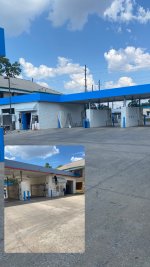
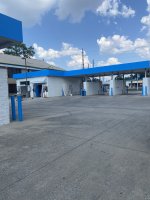
Knocking out some further renovations on my second commercial car wash in overall Houston, Tx off of Kuykendahl Road in Spring, Tx. Thought to share here as I’ve seen some post in the past about interest in the Trusscore panels and I’d thought to share my experience with it.
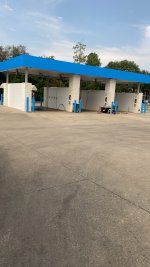
For my install, I had 15.5 walls that were all 17’ wide, 8’ high. I completed all 6 self serve bays
Time of install - 4 days
Days of assisted labor- 2 days
Recommendation of Labor Headcount for large install- 3 to 4 individuals excluding yourself
Things you will need:
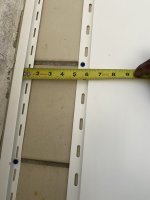
1/2” Thick x 8’ height x 16” length- Trusscore Wall and Board come in packs of 8 at Home Depot - in my case I made use of 25 packs of boards, looking back, would have helped to have 26 total packs(just one on reserve)
J Trim- I overbought initially 58 packs(come 2 per pack), only needed 33 packs. If you overbuy from Home Depot, it’s fine as you can return in your additional supply for a refund.
Total of Material for Frame of reference:
Total = $7,774.36
In my case, I was drilling through old tile and concrete, I used Tapcon 3/16” x 1-3/4”( bought around 6 boxes worth for the install, 225 count per box.
Tools:
Highly recommend Hammer Drill with Hammer Drill Bit for correct sizing - 5/32”x 6” Diablo drill bits worked best( recommend buying 4 or 5 bits as they are guaranteed to break during install or wear out constantly).
Rubber Mallet- Beating the cut-to-size wall board into the edge trims( will take a lot of time as press fits are tight
Pry Bar- To help force in press fit wall boards in edge trims
10” Table Saw for Rip Cuts with 82 Teeth Saw Blade meant for cutting plastic, aluminum, etc. (install the blade on reverse for clean cuts- boards will kick back)
Silicone to water-proof install
Ladders- A Frame ladders of atleast 10 ‘ or so. This will go a long way when doing installs on walls above 8’.
Difficulty of Install: Moderate
The install itself for the main board after installing J- trim up top flows along once your into your groove of things. However, things become more custom/ time consuming when it comes to the ensuring edge trim are level with the corners and cutting boards to size to press fit in. Main recommendation is to not get too frustrated, show yourself some grace, and remember it’s a marathon, not a sprint… Ensure the guys doing the install with you are going to be with you the entire install or you will wind up multiplying your days of labor alone line I did after day 2… Lucked out only paying $450 labor though on what should have been well over $4k in labor. If you are patient, good with your hands, and see things through end to end, it definitely is worth it!
Lastly, I can confirm the walls are low maintenance, even if someone kicks/scuffs them, you can grab a damp rag and clean off quite effortlessly.
This community is amazing and has helped me with my 14 SS Bays and 1 IABS in Houston, so I am glad to finally be able contribute back.
Regards,
Chris J.
Knocking out some further renovations on my second commercial car wash in overall Houston, Tx off of Kuykendahl Road in Spring, Tx. Thought to share here as I’ve seen some post in the past about interest in the Trusscore panels and I’d thought to share my experience with it.
For my install, I had 15.5 walls that were all 17’ wide, 8’ high. I completed all 6 self serve bays
Time of install - 4 days
Days of assisted labor- 2 days
Recommendation of Labor Headcount for large install- 3 to 4 individuals excluding yourself
Things you will need:
1/2” Thick x 8’ height x 16” length- Trusscore Wall and Board come in packs of 8 at Home Depot - in my case I made use of 25 packs of boards, looking back, would have helped to have 26 total packs(just one on reserve)
J Trim- I overbought initially 58 packs(come 2 per pack), only needed 33 packs. If you overbuy from Home Depot, it’s fine as you can return in your additional supply for a refund.
Total of Material for Frame of reference:
Total = $7,774.36
In my case, I was drilling through old tile and concrete, I used Tapcon 3/16” x 1-3/4”( bought around 6 boxes worth for the install, 225 count per box.
Tools:
Highly recommend Hammer Drill with Hammer Drill Bit for correct sizing - 5/32”x 6” Diablo drill bits worked best( recommend buying 4 or 5 bits as they are guaranteed to break during install or wear out constantly).
Rubber Mallet- Beating the cut-to-size wall board into the edge trims( will take a lot of time as press fits are tight
Pry Bar- To help force in press fit wall boards in edge trims
10” Table Saw for Rip Cuts with 82 Teeth Saw Blade meant for cutting plastic, aluminum, etc. (install the blade on reverse for clean cuts- boards will kick back)
Silicone to water-proof install
Ladders- A Frame ladders of atleast 10 ‘ or so. This will go a long way when doing installs on walls above 8’.
Difficulty of Install: Moderate
The install itself for the main board after installing J- trim up top flows along once your into your groove of things. However, things become more custom/ time consuming when it comes to the ensuring edge trim are level with the corners and cutting boards to size to press fit in. Main recommendation is to not get too frustrated, show yourself some grace, and remember it’s a marathon, not a sprint… Ensure the guys doing the install with you are going to be with you the entire install or you will wind up multiplying your days of labor alone line I did after day 2… Lucked out only paying $450 labor though on what should have been well over $4k in labor. If you are patient, good with your hands, and see things through end to end, it definitely is worth it!
Lastly, I can confirm the walls are low maintenance, even if someone kicks/scuffs them, you can grab a damp rag and clean off quite effortlessly.
This community is amazing and has helped me with my 14 SS Bays and 1 IABS in Houston, so I am glad to finally be able contribute back.
Regards,
Chris J.